|
|
|
|
|
|

|
|
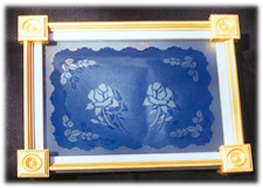
Etched Glass Tray
|
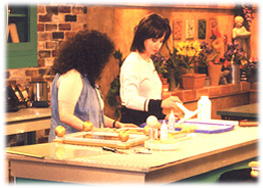
As Seen on Home Matters
|
|
Materials
- 16 x 12 glass
- Plain unpainted wood frame for 16 x 12 insert.
- Dazzling Metallics - Glorious Gold, Shimmering Silver
- ¾ " molding - 2 pieces 10 ½" and 2 pieces 14 ¼"
- 4 corner rosettes - 2 ½"
- 4 wood doll heads - 2 ½"
- Lowe-Cornell wash brush
- Etchall - etching cream, pick tool & mini squeegee
- Self-adhesive stencil. You can use stickers or create your own patterns from contact paper.
- Brayer
- Squeegee
- Plastic coated paper plates
- Wax paper or sheet of plastic to protect work surface
- Beacon Adhesives FabriTac Glue
- Glazing Points
- Putty knife
- Flat board or other object at least the same size as the frame
- Heavy object
Creating Frame
- Paint frame silver and all other pieces of wood gold. Set aside to dry.
- Place the molding and rosettes along edge of frame. Glue in place.
- Cover frame with flat surface and place heavy objects on top. This will act like a clamp.
Etching Glass
- Fold down about 1-2" back of stencil. Place over glass and slowly pull away rest of backing so that stencil lays flat. Do not worry about small bubbles at this time.
- Smooth surface with brayer using light pressure. Be careful not to break glass.
- Remove pieces of stencil with Pick Tool (little knife) by holding under piece and lifting away from cut line. Remove the areas that you want to etch. The areas where the stencil remains will stay clear.
- Make sure there are no bubbles near the cut line.
- Pour cream, starting at top and spread with squeegee in for an even, thick coat. The product can be poured back into the bottle and used over and over again.
- Set aside for 15 minutes. For a deeper etch, reactivate the product after 15 minutes and allow cream to sit another 15 minutes. You reactivate by moving it around with the squeegee. Cream can be left on for as long as you like without harming project.
- Wash and peal away the stencil. It is best to wash this is a tub rather than running water since the cream could get under the stencil if the water loosens it. This would cause the unexposed areas to start etching. Do not peal away any of the stencil until all traces of cream have been removed.
Putting it all together
- Place glass in frame and secure with glazing points. These should be pushed in place with the putty knife - using even pressure.
- Glue doll heads onto all 4 corers on back of frame.
- Cover once again with flat surface and place heavy objects on top.
This bed tray is for decorative use. To make it usable have a piece of heavy duty glass cut by a glazier. If you tell them the purpose of your glass they will know what thickness to cut.
|
|
|
Copyright © 1999-2007 By Susan Designs.
All rights reserved
|
|